Showing posts with label recipe. Show all posts

Monday, June 20, 2016

The Grape Gatsby (along with an easy grape jelly recipe)

One of my resolutions at the start of the year was to expand my garden and plant new things.  Normally, I'm really horrible at keeping up with my resolutions, but this year (this year) I promised myself I would do better.  So shortly after January 1st, as we were meandering the garden section of the local home improvement store, I stumbled upon the tree and shrub section.  As it was the middle of winter, the selection was understandably meager; but among the remaining apple, citrus and peach start-ups sat a meager little stick of a grapevine.

And when I say stick, I mean quite literally it looked like just a stick.  No leaves, no hint of growth possibility; it was a stick and a tiny rootball wrapped up in plastic.

I must have walked away and come back to that little stick about 4 different times, trying to decide if I really wanted to give grape-growing a go (Ooo...say that 5 times quickly).  The apple-tree stems had at least a few branches to them, the peach-stems even had a few leaves.  There was nothing to this meager little stick-in-a-bag but hope and possibility.  But somewhere inside me, it sounded like fun to give it a try; so channeling my inner Charlie Brown, I finally scooped it up and walked to the cashier.

Giving me more than one look of uncertainty at my selection, Nick humored me and paid for the stick and a new pot to plant it in.  On the drive home, I seem to recall him asking me more than once if I was sure it was going to grow into something.  Answering with more confidence than I truly felt, I replied that it would and proceeded to give it a home (and a name) in the backyard.

I introduced into the (mostly) dormant garden, a stick named Gatsby.


(I amuse myself with my own simple brand of humor 😋)

With diligence and determination, I checked on Gatsby daily.  I made sure he was in a bright and sunny area, gave him water as needed, and plenty of room to grow.  For quite some time he stayed in stick-mode; not really seeming to grow or do much.  But I wouldn't give up.  For the most part, the process went rather smoothly and quietly.  What little excitement we had came in the form of a near-fatal mishap when a winter storm knocked Gatsby's home over.  I came out the next day to find part of his roots exposed and soil spread across the patio.  But after being up-righted, given new soil and words of encouragement (plus a good shoring up with bricks around the base), he proved to be tough and persevered.

And then one day, faith and patience paid off.  Peeking out of the stick, like magic, appeared tiny little blooms:


Tiny, adorable, joyful little pink buds.

Within a week those happy little pink buds grew into leaves....


Weeks turned into months, leaves turned into teeny-tiny little grapes until one day...


Grapes!!!  Real, live, grapes!!


Grapes so fresh, you could smell them just standing near the vines.  And the flavor?  Warm and juicy and bright - I never knew grapes could taste so flavorful.

All of these fabulous smells and flavors - what could I possibly do with them?  Wine was the obvious first choice...but it would have to be non-alcoholic...which at that point is just grape juice.  Meh.
The grapes alone were delicious enough to eat as is - but with all the seeds, I could only eat a few before fear of biting down on one too hard and cracking a crown got the better of me.

What to do...what to do.  And then as I was contemplating lunch ideas it came to me in a flash.  Jelly!!!  I could make my own, real, grape jelly.  What better way to showcase the smells and flavors of my freshly grown grapes than to concentrate and compress their awesomeness into a jar of jelly. And when paired up with the salty goodness of fresh peanut butter on homebaked bread; mmmm...what an awesome showcase for a stick of such humble beginnings.

Growing grapes in the garden and turning them into jelly...definitely a much more exciting resolution to keep than the same old boring weight loss goals each year.

Look out apples - as soon as I find the room, I'm comin' for you next!!


Gatsby's Grape Jelly


Ingredients:
1 lb grapes (seedless or not - either is fine)
3 oz water
1/4 - 1/2 cup sugar
1/4 - 1/2 tbsp sugar-free pectin (I used Pomona's)

Directions:

Remove grapes from their stems - sort out any unripened grapes or raisins - rinse well through water.
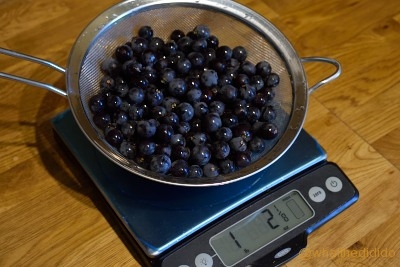

Put the grapes and the water into a large saucepot.  Turn heat to medium-low to allow the water to simmer and the grapes to start to cook.  Stir often.


As you stir, the grapes will begin to burst, the peels will start to come off, and the water will turn an awesome shade of purple.  When most of the peels are removed, turn off the heat and let them hang out for just a bit.


If you have an immersion blender, puree the grapes well.  If you're using a blender, remember to leave the center piece out of the lid so the hot liquid doesn't explode and make a disastrous mess on the wall, the counter top, behind the stove, inside cookbooks....


(not that I would have any first hand knowledge of this type of thing happening.... 😳)

Using a metal sieve or colander, push all of the solids through into a slighly smaller saucepot - getting as much juice out as possible.  Bring everything back up to a simmer - stir in 1/4 tsp pectin - let dissolve - then add the sugar.

*Hint:  I started with 1/4 sugar because the grapes were already so sweet - and just added in a little more as needed.  


Continue to slowly simmer for about 20 minutes - or until the jelly slides off the back of a spoon in sheets.  If your jelly is still very runny after 20 minutes, add in a little bit more pectin; but realize that it will set and firm up as it cools, so don't get too crazy with it.

*Confession:  I went a little overboard - and unfortunately my finished product was more gel than jelly.  It still tasted awesome...but spreading it on bread just took a little more finesse.

Once your jelly is ready, remove from heat and pour into heat-proof containers (well cleaned).  It will store in the refrigerator for 1-2 months.  You can also freeze in batches if you desire.
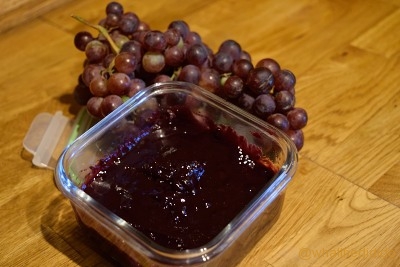

You can double the recipe as needed - again, just adjust the sugar levels to taste and keep a careful eye on how much pectin you use.


Recipe adapted from Cinnamon Spice & Everything Nice (find the link HERE) and with advice from Sundays Marmalade (visit their awesomeness HERE)

Tuesday, April 26, 2016

Baking Sweet Memories...In Honor of National Pretzel Day

In my long-time-ago, younger days, I remember how going to the mall seemed like more of a special occasion than an everyday destination.  Perhaps it was because my parents rarely had a day off together in my youth and didn’t want to waste precious time surrounded by thousands of their closest friends at the mall, or maybe it was too much of a hassle for them to have to perpetually wrangle two small children who wanted nothing more than to stop every 50 feet and stare at all of the wondrous things in the windows.

Maybe both.

Either way, when the decision was finally made to go shopping at one of two malls in the booming metropolis of my home town – I remember the trip filled with excitement and anticipation.   Not because of the potential treasures to be bought and brought home – clothes, furniture, whatever.  Nope.  I was in it for the pretzels.  Hot Sam Pretzels, to be precise.

Photo courtesy of Pintrest

No trip to the mall was complete without a stop at Hot Sam for a pretzel and a drink.  We’d be walking around all day, and just when my little tiny legs didn’t think they could go any further, there…off in the distance…like a beacon…stood the Hot Sam pretzel place.  As soon as I could smell the bread, I’d start tugging on arms and shirts begging to stop.  My mother would pretend to protest, claiming we’d spoil our dinner, or dad would tease that they were probably already out of pretzels anyway…all the while we would be making our way to the counter.  I was a bit short, so I couldn’t quite see the magic that was happening behind the curtain, but I could feel the heat and look up to watch the pretzels rotate in the warmer on the counter above me.   Dad ordered and paid while mom collected and handed off the warm bag filled with soft twisted bread to my anxiously awaiting hands. Together we would all sit on the nearby bench; I’d tear into my pretzel piece by piece, chewing and savoring the buttery goodness while pieces of salt fell all around me.   I remember the pretzels having just the right crispiness outside, but never too dense on the inside.

Flat out - they were really good pretzels.

Hot Sam is long gone, but for National Pretzel Day, I decided I would try to recreate the magical, mystical pretzels from my youth.   Of course that also meant I would have to deal with my irrational fear of yeast…which I still have, no matter how much bread I bake.   Yeast aside, this recipe is very simple.  It is a bit time consuming – and there appears to be a lot of steps to the recipe – but once you get going, it actually moves very quickly, very easily.  You could even bring in the kids to help with the shaping, basting and salt sprinkling.

And…you're going to end up with really good pretzels.

Food and memories - I still find it amazing how they come together.  One bite, one smell, or the reminder of a name and suddenly I’m in the middle of a childhood memory; sitting on a cool bench with a hot pretzel, surrounded by the white noise of a busy mall, blissfully enjoying a simple moment of rest during a day out with my family.  Today, I put a little bit of time together with a few ingredients and now I have a whole new memory to add to the first.  This time, it's of me standing in my awesome smelling kitchen on a warm spring day with the smile of satisfaction on my face, proudly declaring “I just made pretzels” as my husband asks for another and another and another.

Told ya...they're just darn good pretzels.


Soft Pretzel Nuggets


Ingredients:
2 packages active dry yeast (approx. 4 tsp)
1 Tbsp white sugar
1 1/2 teaspoons salt
1 1/4 cups warm water (110 degrees F/45 degrees C)
4 cups all-purpose flour – more if needed
1 tablespoon butter – melted
2 Tbsp sugar
4 cups hot water
¼ cup baking soda
1 egg white and 1 Tbsp water (for egg wash)
1/4 cup kosher salt, for topping

Directions:
Warm your mixing bowl by rinsing it in hot water.  Dry.  Add 1 ¼ cup warm water (water hot from the tap will work), kosher salt and 1 Tbsp sugar.  Measure temperature before you add the yeast....

...make sure you're no warmer than 110 or you'll "kill" the yeast.....

Had to let my water cool just a touch....
When you're at 110, sprinkle in the yeast.  Let stand until creamy, about 10 minutes.


To the mixing bowl, add the butter, 2 Tbsp sugar and flour. Mix to form into a dough.


Knead the dough until smooth, about 7 to 8 minutes.   If the mixture still seems sticky, add one or two more tablespoons of flour.  When the dough is well combined, remove from mixer and knead just a few more times until it's nice and smooth:


Lightly oil a large bowl, place the dough in the bowl, and turn it to coat with oil. Cover the bowl with a clean dish towel and let rise in a warm place until doubled in size, about 90 minutes (if it's not a warm day, or cold in your kitchen, put it in oven and leave the light on).


When ready, your dough has risen to about twice its original size:


Right about now, dissolve 1/4 cup baking soda in a pot with 4 cups hot (but not boiling) water – keep warm on stovetop until ready.

Now (the fun part) - punch down the dough:


grrr...brute strength.  💪

Turn the dough out of the bowl onto your countertop and knead just a couple of times (*IMPORTANT – do not use a floured surface.  If done correctly, the dough should lift and work on its own.  If it’s not cooperating, cover your hands with a bit of oil and work through).

Cut off a piece of dough with a pastry knife (or regular knife) – and put the rest of the dough back in the bowl, recovering with towel so as to not dry out.

Working from the middle, roll the piece into a rope about the width of a quarter.


Cut them down to about 1-inch squares.


Bring your pot of hot water over and place on a safe surface near where you’re going to cut and shape your dough.  Set a clean dishcloth nearby that the pieces can dry off on after they come out of the water.


Take the nuggets and drop them into the water for about 15 seconds (you can do about 10 at a time – just make sure they’re not too crowded).  Stir a bit, fish them out and place on the nearby towel.  Cover and go back to your dough bowl to work on the next piece.


Once all of your dough is cut and bathed in the baking soda bath, move the pieces to sheet pans lined with silicon or parchment paper.   Cover with towel and let rise for 15 more minutes.

Preheat oven to 400 degrees F

Brush dough with egg wash and sprinkle with kosher salt.


Bake in preheated oven until browned, about 10-12 minutes (I baked mine at 10, but if you want yours a little browner, go for 12.  Just keep an eye out because they brown up quickly)


When done, remove from pan, cool on rack and enjoy!!!!


Recipe adapted from AllRecipes.com...find the original HERE

Thursday, February 11, 2016

A Wintery Pepperminty Patty Recipe (for National Peppermint Patty Day)

So having given up sugar for Lent, here we are one day after Ash Wednesday and I'm already pushing candy.  But it's Peppermint Patty Day...and I love peppermint patties.  Not the big ones - the little mini-sampler sized ones.  When I was younger, while driving home from school my mother would occasionally stop at a convenience store and treat my sister and I to an ice cold soda and a tiny York Peppermint Patty.  It was our little secret treat - not all the time, and it was just enough of a treat that it wouldn't ruin our dinner.  To this day, there is still something magical about the combination of carbonated water and minty chocolate that makes me think of those drives home and smile.
So how could I pass up the opportunity to try making them?


...and I'll let you in on a little secret...I actually made these last Sunday, before the start of sacrifice-everything season, so technically, I'm still on the wagon.  :-P 

These peppermint patties are definitely smooth and with a melt-in-your-mouth consistency.  They take a little bit of time to make - but this is a very simple recipe...you can even get the kids involved!!
I especially liked how well the flavors melded together - there wasn't any one taste that overpowered the other.  I used Simply Organic Peppermint Flavor (made with peppermint oil) and found that 1 1/2 teaspoons of peppermint was more than enough - if you use a peppermint extract, you may need to add a little more to get enough mint flavoring.  But since there's nothing to bake in this recipe, you can always sample as you go along.

...just don't sample too far, OK?

Another cool thing about this recipe - it's nut-allergy friendly.  You can use Guittard chocolates since they’re made in a nut-free factory (it says so right on the package :-) ).  And I read on The Nut-Free Mom blog that McCormick doesn't use peanuts or tree nuts in any of their facilities - so you can use their peppermint and vanilla extracts for this recipe*.


I have to tell you - I don't have nut allergies myself, but ever since the no-nut brittle recipe I made for my friend, I'm much more aware of food allergies and what's safe for my friends and their families.
Minty-flavored memories for everyone!!!!!


Peppermint Patty Recipe


Ingredients:
 2 tbsp butter
Pinch salt
4 tbsp sweetened condensed milk
1 1/2 teaspoons peppermint flavor
½ tsp vanilla
1 1/2 cups confectioners’ sugar (plus a little for dusting)
1-2 cups semisweet chocolate chips


Directions:
In a large mixing bowl, combine butter and salt – blend in condensed milk and add peppermint/vanilla extract. Beat in enough confectioners' sugar, a little at a time, to form a stiff dough.  It will seem a little crumbly – put everything on a lightly sugared surface and knead together.


Pinching off a bit of dough, use the warmth of your hand to form a one-inch ball.


Flatten the ball between your palms, place on silicone sheet or parchment paper firm the edges to form patties.


Let patties dry in the refrigerator for 1-2 hours.


In a double boiler – or bowl over hot water method – melt the chocolate.

Lift the patties off the sheet carefully and flip over.  Using a basting brush, “paint” the chocolate on each patty and around sides.  Put back in the refrigerator for 30 minutes to one hour.


Holding the patties chocolate side down, carefully paint the other side, set back on the sheet wet side up and let chill in the ‘fridge for another 1-2 hours.  Work quickly – the chocolate on the first side may try to melt in your hand.

Patties will keep refrigerated in an airtight container.  They can sit out at room temperature for about 2 hours before they get too soft.

*As always, I'm not a doctor or allergist - so please be sure to check all ingredients yourself to verify that they are acceptable to you and your family.  Safety first!   :-)


Recipe adapted by me from Allrecipes.com - find the original HERE

Tuesday, February 9, 2016

King Cake For Your Fat Tuesday Celebration

Today is Fat Tuesday - the culmination of all the partying done during Carnival...and the last day before you give it all up for Lent.  I, personally, have never been to New Orleans (it's on the list) - but even from afar, I love the festivity,  the excitement and pageantry that is Mardi Gras.  The parades, the music, the colors - it just seems like such a fantastic celebration of life to me.  And I love that New Orleans - a city that has seen its fair share of troubles and hardships- never lets the adversity get it down.  Ever year the people of the city come out with colors ablaze and music blaring and show the entire world that they just won't ever be silenced.

It's very inspiring.


In many European countries, New Orleans and beyond, one of the greatest symbols of the Mardi Gras-Carnival season is the King Cake.  Although not a cake in the traditional sense as we know it with fluffy layers and sugary sweet icing, King Cake is more akin to a cinnamon bread or pastry.  King Cakes can be made a variety of ways - from the more complex from-scratch method of bread dough or puff pastry to a very simple method utilizing store-bought cinnamon roll dough.

Last year I was a little lazy about my King Cake (I put all of my energy into Jambalaya and corn bread) - and I went the cinnamon roll dough route.  It came out great - don't get me wrong; I just used this recipe from Pillsbury.  But this year I decided to challenge myself and make one from scratch.
Now if you think my fear of baking is bad, trust me, it's nothing next to the fear of baking bread. I hate working with yeast - it's just too temperamental for me.  I've made loaves that don't rise higher than an inch and I've made bread so tough and solid, it could be categorized as lethal weapons.  But I decided to put my fears aside and create King Cake from scratch...temperamental, cranky yeast and all.

And what do you know - my bread dough rose nice and high and wasn't as hard as a rock.  This has a more traditional bread consistency; very light and cinnamon-y.

Don't be intimidated by all the steps.  It takes a little time, but it's very easy.  I promise.

So let's crank up the jazz, blues and zydeco music, pour a couple of Hurricanes and laissez les bons temps rouler!!


King Cake Recipe:

Ingredients:


Cake:
1/2 cup warm water (110 to 115 degrees)
2 packages active dry yeast
1/2 cup plus 1 teaspoon sugar
1 cup milk
4 Tbsp butter
2 eggs
1 teaspoon nutmeg
1 1/2 teaspoons salt
5 1/2 cups flour unsifted
Vegetable oil
1 Tbsp cinnamon (divided)
1 1″ plastic baby doll

Icing:
1 cups confectioners’ sugar
1-2 tablespoons water

Colored sugars
Green, red, blue, & yellow gels
6 - 12 tablespoons sugar (depends on how much decoration you want)

Directions:
If your house is cold, turn your oven on to a warm setting (if available) – or the lowest setting possible.

Scald milk (watch for tiny bubbles around the perimeter).


Remove from heat and melt in the 4 Tbsp butter.  Allow mixture to cool.

Pour the warm water into a small shallow bowl, and sprinkle yeast and 2 teaspoons sugar into it. Be sure your water is not hotter than 115 degrees or you will kill the yeast (I’ve done this – it sucks).  Allow the yeast and sugar to rest for three minutes then mix thoroughly. Set bowl in a warm place for ten minutes, or until yeast bubbles up and mixture almost doubles in volume (if your house is cold, you can open your warmed oven door and set the bowl on the door to help it along – just don’t let it get too hot)


When your yeast mixture is ready, stir in the milk mixture (if it’s not quite at room temperature, just stream it in slowly to the yeast (tempering – you don’t want to shock your yeast mixture with heated liquid too quickly).  Since I created the yeast mixture in a glass bowl, at this point I transferred everything to my mixer bowl.

Whisk in your eggs and stir in the remaining sugar (1/2 cup), salt and nutmeg.  I like using fresh nutmeg, so I mainly eyeballed the amount.


If you haven't done so already, turn off your oven, but keep door closed.

Turn on your mixer and start adding in the flour one cup at a time.  When your dough has pulled together (or your mixer just can’t take it any longer) – pull it out of the bowl and onto a lightly floured surface and start kneading until it’s smooth and not sticky (took me about 8 minutes of good kneading).


Coat the inside of a large bowl with either butter or oil.  Put the dough ball in the bowl and turn until the entire surface is covered.  Cover the bowl with a kitchen towel or plastic wrap (loosely) and place in a warm place (like your now slightly cooled oven) for 1 ½ hours – or until the dough doubles in volume.  *If your house is relatively warm, you can just leave the dough covered on the counter away from drafts and it’ll rise just fine.  My house was freezing - so into the warmed oven it went....


When ready, remove dough from bowl and turn it out onto a lightly floured surface. Using your fist, punch dough down forcefully.


I really wanted to show you how much the dough grew over an hour and a half - but I got so excited about punching it down, that I completely forgot to snap the picture.  So...there's what it looks like post-puff.   :-)

Divide your dough into two balls and swing them out into long cylinders.  Sprinkle cinnamon over the top.


Twist the two strips together to form one spiral and then loop into a circle.

See all that great cinnamon in the folds?

Place the dough on a non-stick, well-buttered, or silicon-sheet covered baking sheet.  Cover with a towel and let sit for another 30 minutes.

Preheat oven to 375 degrees.

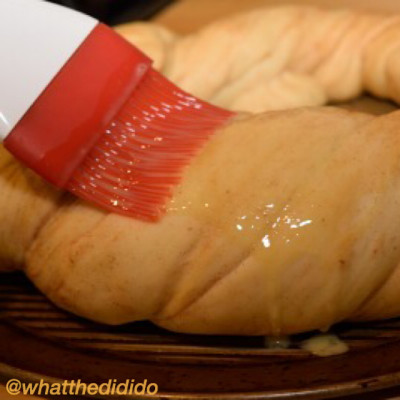
Brush top and sides of cake with egg wash (one egg and one Tbsp water well blended).


Bake on middle rack of oven for 25 to 35 minutes until golden brown. Place cake on wire rack to cool.


Make the icing and sugars *below.  Hide the plastic baby through the bottom of the cake (if desired).  Spread icing over the top of the cake (I used a basting brush)…and decorate with colored sugars in the traditional Mardi Gras colors of green (for faith), gold (for power), and purple (for justice) as desired.

Icing
Combine sugar, water until smooth. If icing is too stiff, add more water until spreadable.

Colored sugars
Divide the sugar into sealable bags (1-2 in one, 1-2 in another, 4-8 in a third).  In one bag, squeeze two drops of yellow, seal and knead until the color saturates all the sugar.


In second bag, squeeze two drops of green and repeat.  In the third bag, squeeze 3 drops of blue and 4 drops of red and knead.


Recipe is my adaptation using a combination from two websites: All Recipes (HERE) and Mardi Gras Day (HERE)
Tuesday, January 26, 2016

A No-Nut Brittle For Peanut Brittle Day

Today is National Peanut Brittle Day.  I remember my mom occasionally getting boxes of peanut brittle from See's Candies for some random holiday and sneaking bits and pieces of it out of the box, hoping she wouldn't notice.  I loved the crunch of the candy with its buttery, caramel taste, mixed in with the texture of the peanuts...which was then promptly followed by those aggravating little pieces melting just enough to get stuck in my teeth.  Realizing I haven't had peanut brittle in ages, much less that I've never even made it, I went in search of a recipe for Peanut Brittle Day.

By the way...there are A LOT of peanut brittle recipes out there on the world wide web.

Peanut brittle itself is pretty basic - sugar, corn syrup, nuts, butter and vanilla.  But the more I looked at Mom's, Golden Buttery, and Classic peanut brittle recipes on the web, the more I realized I wanted to create something...different.

Then I remembered my friend Stefanie.

Stefanie's son, Jordan, has a severe nut allergy.  Very severe.  To the point where it's almost killed him.  Needless to say, they are very strict about monitoring what foods come in their home so as to not trigger an attack - they carefully check the labels to make sure that nothing has the "made in a facility which processes peanuts or nuts".

So I wondered....could I create a no-nut peanut brittle that her family could enjoy for Peanut Brittle Day?

I started scouring the internet for recipe ideas.  At first, seeds seemed like a good idea; there are a lot of brittle recipes using pumpkin seeds or sunflower seeds.  But as I was gathering ingredients at the store, I hit a wall.


Slightly dejected, I wandered around the grocery store, gathering the rest of my ingredients, trying to come up with an alternative plan.  Randomly grabbing some foods off the shelves, I saw more and more the "made in a facility..." notice on the labels.  Never having any allergies myself, I suddenly realized just how difficult living with a food allergy must be; to not just be able to grab something and go without worry.  Suddenly I found myself with a much greater appreciation for what people with allergies (and especially parents) have to go through to ensure their or their kids safety.  Now more determined than ever to find an alternative, I wandered down the the canned food aisle.  Suddenly...a revelation!!!  A quick search of the internet showed me just one link to my idea - so this would be new-ish and different.  And the final test...the label had no "made in a facility..." warning on it.  I found a winner.

But...would it taste good?

It did.  It does.  AND, it's very easy to make.

I present to you - brittle made with.....


It's crazy...but it works.  Garbanzo Bean Brittle still gives you that sweet, caramel-y, buttery brittle taste, and the same nut-like consistency...but without the nuts.

YAY!

Now, before we go any further, I did a little more research on the interwebs and found out that the garbanzo bean is a legume that is distantly related to the peanut.  There are some cases of people with peanut allergies having reactions to garbanzo beans...and then there are those that do not.  I ran my list of ingredients past Stefanie and got the green light to proceed - but before you make this recipe, please check with your doctor or allergist.  Because although Garbanzo Bean Brittle is AWESOMELY GOOD - it's not worth going into anaphylactic shock over.  Safety first!

Now let's get cookin'!!

Garbanzo Bean Brittle:

Ingredients-
1 can Garbanzo Beans
1 1/2 tsp - Baking Soda
1 tsp - Water
1 tsp - Vanilla
1 1/2 cups - Sugar
1 cup - Water
1 cup - Light Corn Syrup
3 Tbsp - Butter (plus extra for buttering pans)
Special equipment - Candy Thermometer (or instant read that you can hold)

Directions-
Drain and rinse the garbanzo beans in a sieve.  Remove the transparent skin from all the beans, rinse again, pat dry with paper towels and set aside.


This step takes the most time and it is a pain in the butt - but it makes a huge difference.

Heat your oven to 150 degrees.  Butter two baking sheets and place in the oven to warm up.  Clear a place near your stovetop for them to sit for when you pull them out of the oven and pour the candy onto.

In a small bowl, mix the baking soda, 1 tsp water and vanilla together.  Set aside.

In a 3-4 qt saucepan, mix together the sugar, 1 cup water and corn syrup -do not use a smaller pot.   Place over medium low heat and clip on your thermometer.

Sugar, Corn Syrup and Water - stir until sugar melted and liquid is clear
Stir until the sugar is melted - and then let cook to 240 degrees.  Don't crank your heat up to hurry it along - you don't want your sugar to burn.  Between medium low and medium (depending on your stove) works just fine.

Sugar is melted, liquid is simmering - temperature is rising

Closer to 240 - the liquid will start to look thicker
When you hit 240, stir in your garbanzo beans and butter.  At this point you will stir continuously to prevent sticking and burning.


When your thermometer hits 275, remove the pans from the oven and place nearby - keep stirring the pot. At about 285, give the bowl with the baking soda mixture a stir with your free hand - just to make sure it's good and combined again - keep stirring the pot.  Continue stirring and cooking to 300 degrees.

At 300, immediately remove from heat and quickly stir in the baking soda mixture.  Your candy will quickly get light and fluffy looking - that's what you want, don't overstir.

It's so fluffy!  Stir just enough to blend the mixture
Stop stirring and pour 1/2 the mixture onto each of the pans.


Quickly spread out the mixture slightly so it's about 1/4 inch thick.  Don't spread it too thin - you want the baking soda to help give it a little height.


Set aside to cool (if it's humid, you can place it in the refrigerator).

Break into pieces and enjoy!!!  (store leftovers in an airtight container)


So there you have it...a brittle that keeps to the original peanut-brittle taste, but without any peanuts in it.


I have to admit...I wasn't quite sure how this was going to turn out.  But I guess that's the fun of creating recipes...the will-it or won't-it surprise at the end.  And I feel even more proud of this recipe because hopefully it means Stefanie and her family can enjoy all of the caramel-y, buttery, brittle goodness I remember as a child.

Complete with all the aggravating little bits stuck in her teeth.  :-)

Enjoy!!!!

Recipe created with a thanks and help from Stefanie, and the Betty Crocker Peanut Brittle recipe.  You can find the original HERE